Repair damaged coating
Repairing damaged Conformal Coating is a common task in PCB Assembly and SMT Assembly, especially when defects, handling damage, or component rework occur. A proper repair process restores protection without affecting circuit performance.
Identify the damage type
Before repair, determine the issue:
- Scratches or thin coating areas
- Cracks or peeling
- Bubbles or voids
- Contamination under the coating
- Burned or chemically damaged spots
Understanding the defect helps choose the correct repair method in Turnkey PCB Assembly.
Select the right repair method
Different coatings require different approaches:
- Acrylic coatings → easy to dissolve and rework
- Silicone coatings → flexible but harder to remove
- Urethane coatings → chemical resistance, moderate difficulty
- Epoxy coatings → very tough, difficult to repair
Choosing the correct method prevents further damage to the PCB.
Remove the damaged coating
Use appropriate removal techniques:
- Solvent removal for acrylic coatings
- Mechanical removal (scraping, micro-abrasion) for localized areas
- Chemical stripping for tougher coatings
- Controlled heat to soften certain materials
In PCB Assembly, removal should be limited only to the damaged area to protect surrounding components.
Clean the surface thoroughly
After removal:
- Use approved cleaning solvents
- Remove residues, dust, and contaminants
- Ensure the area is completely dry
Proper cleaning is essential for good adhesion when reapplying Conformal Coating.
Repair the PCB if needed
If the damage affected the circuit:
- Replace or resolder components
- Repair traces or pads
- Perform electrical checks
This step ensures the board is fully functional before recoating in SMT Assembly.
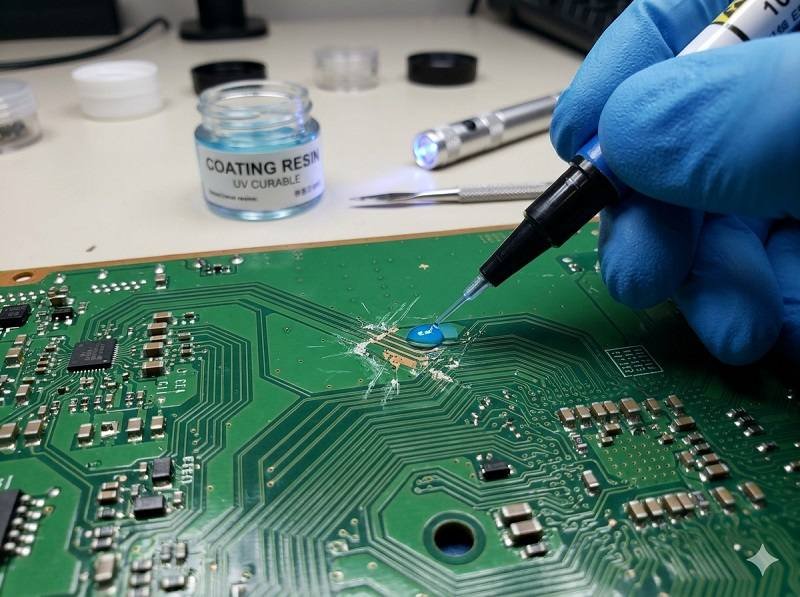
Reapply conformal coating
Apply new coating to the repaired area:
- Use brush, spray, or selective coating methods
- Match the original coating type when possible
- Maintain uniform thickness and smooth coverage
Avoid overcoating connectors, test points, and other no-coat zones in Turnkey PCB Assembly.
Cure the coating
Curing depends on the material:
- Air drying (acrylic)
- Heat curing (urethane, epoxy)
- UV curing (UV-curable coatings)
Follow proper curing conditions to ensure durability.
Inspect the repaired area
After curing:
- Use UV inspection to check coverage
- Verify no bubbles, gaps, or contamination
- Confirm proper adhesion and thickness
Inspection ensures the repair meets PCB Assembly quality standards.
Best practices for coating repair
- Use coatings that allow easy rework when possible
- Minimize the repair area to avoid unnecessary removal
- Follow strict cleaning and handling procedures
- Train technicians for precise repair work
Conclusion
Repairing damaged Conformal Coating involves careful removal, cleaning, repair, and reapplication. In PCB Assembly, SMT Assembly, and Turnkey PCB Assembly, a well-controlled repair process restores protection, maintains reliability, and extends the lifespan of electronic products.
Get a Conformal Coating Quote
Want to improve your PCB reliability with conformal coating? Send us your details now.
Send us your requirements and get a fast response from our engineering team.
✔ 24-hour response ✔ Engineering support ✔ Small & Mass Production
Shenzhen Tengxinjie Electronics Co., Ltd.